Connections
The connectors at the front of the MidiGurdy connect the instrument with all external components and devices.
Power Supply

The MidiGurdy power connections
The MidiGurdy can be powered from three different sources:
By inserting eight AA / R6 / Mignon batteries or rechargeable batteries
By attaching the included 5V power supply
By attaching the USB-B port to another USB device like a computer, laptop or phone charger via a suitable USB cable
All three power sources can also be connected at the same time. The MidiGurdy will always choose the best source available and show the currently selected source in the top right corner of the display.
When the 5V power supply is connected, the instrument will always be powered via this source and will draw no power from the batteries or the USB port. When powered via USB and batteries, the instrument will mainly draw power from the USB connection and only fall back to the batteries if the USB connection cannot supply enough current.
Concerning Batteries
The MidiGurdy is designed to be used with eight AA batteries (also called R6 or Mignon cells). Either primary (disposable) or secondary (rechargeable) cells can be used. We recommend high-capacity 2500mAh NiMH rechargeable batteries, which will give you an estimated 10 – 12 hours of solid playing time.
The MidiGurdy does not contain a battery charger. If you use rechargeable batteries (which we highly recommend), you will need an external charger to bring them back to charge.
Warning
Always replace all batteries when inserting fresh batteries into the instrument, never replace only individual cells.
Please check the polarity of the batteries carefully before inserting them into the instrument!
Headphones
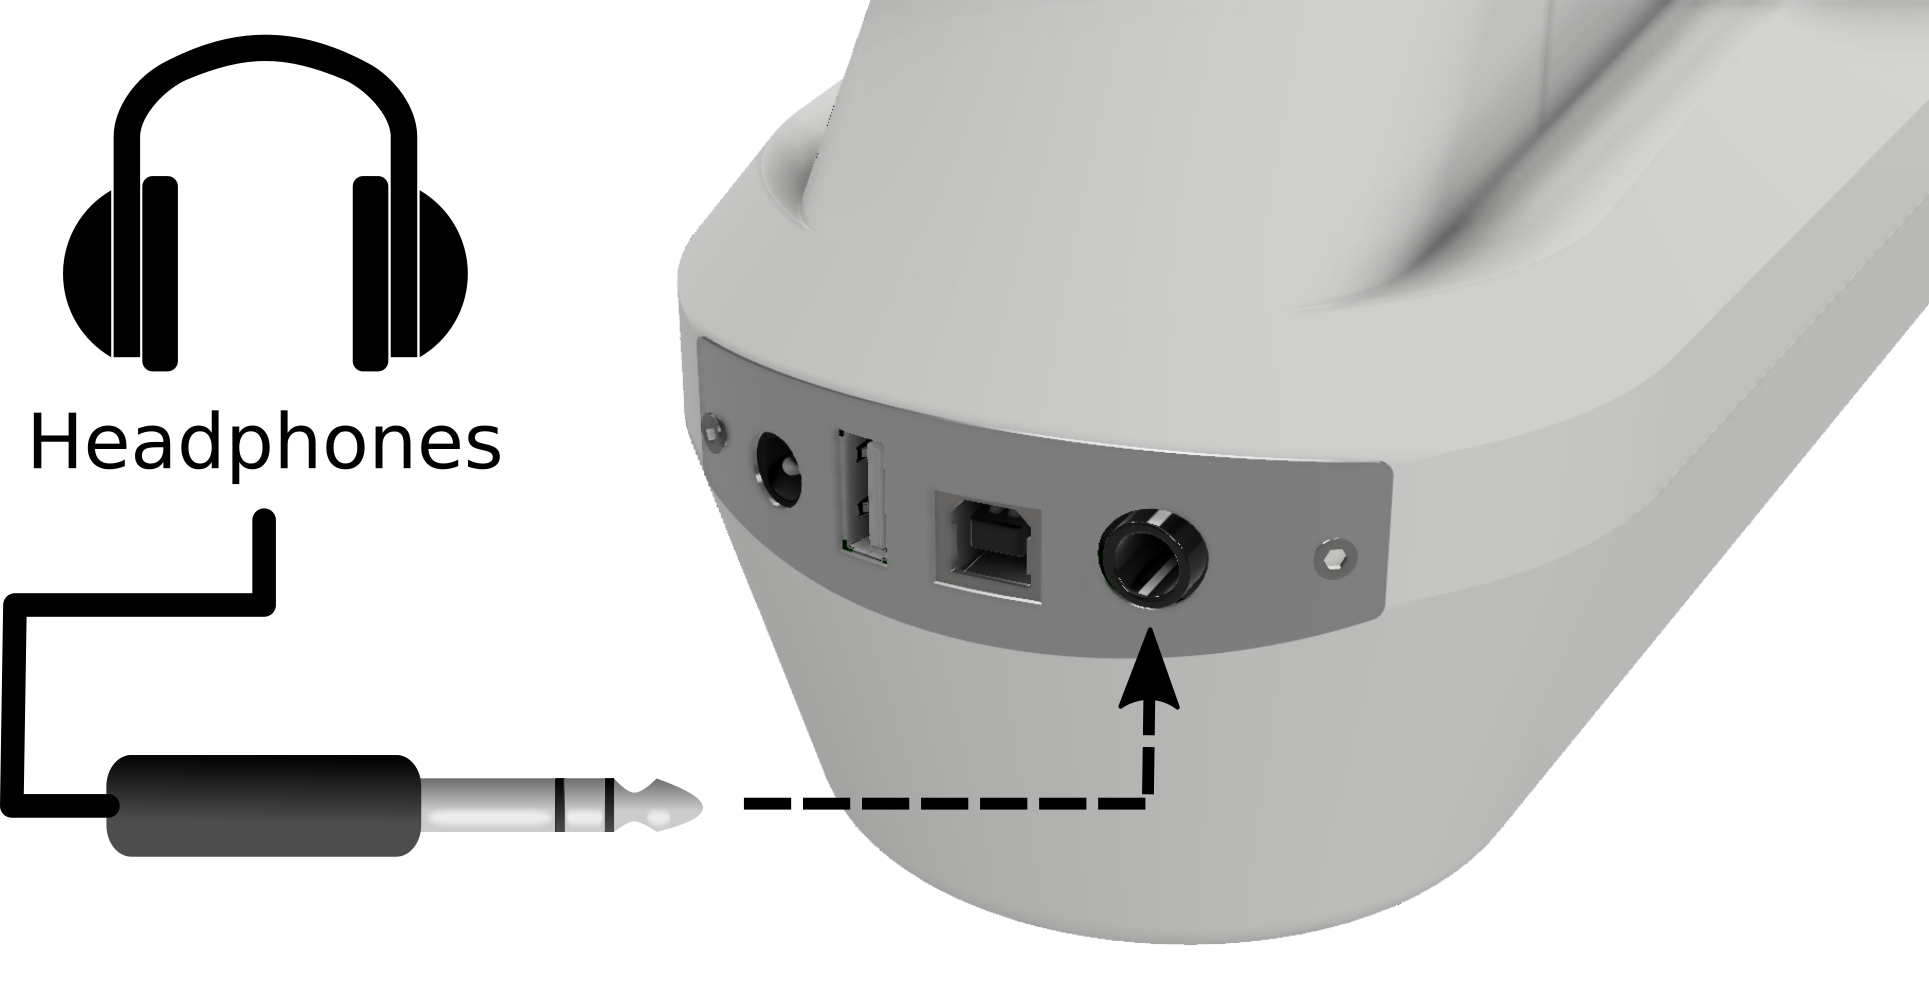
Connecting headphones to the MidiGurdy
The MidiGurdy outputs all sound via the 6,3mm (¼ inch) stereo jack connector. Simply insert the headphones and adjust the volume of the instrument to comfortable levels. See Volume Menus on how to change the volume.
Other Sound Equipment

Connecting other sound equipment
To connect the MidiGurdy to an amplifier, a mixing console, recording device or other sound equipment, please use the supplied Y-cable and breakout box (“DI-box”). Connect the single stereo plug of the Y-cable to the headphone jack of the MidiGurdy and the two mono plugs to the ports on the breakout box marked “Input 1” and “Input 2”. Then connect one or both “Output” ports of the breakout box to the amplifier or other sound equipment.
Data Connection to Computer or Tablet via USB
To connect the MidiGurdy with a desktop computer, tablet or other device please use a USB-A to USB-B cable, as used for most USB printers.
Once connected, the MidiGurdy will act as two separate USB devices via this connection:
as a USB network card
as a USB-MIDI controller
Both function use a standard implementation and should therefore work on any modern computer or tablet without installing additional drivers.
Note
If your device provides enough power via the USB port, the MidiGurdy will use this connection to power itself, unless the 5V power supply (see above) is plugged in.
For more information on how to use the MidiGurdy via the USB connection, please refer to section The Web Interface.
External Synthesizer via USB-MIDI Connection
The MidiGurdy provides a standard USB-MIDI connection via the USB-B port and can therefore be used to control external synthesizers or other MIDI capable devices that have a USB-MIDI interface.
Simply attach the MidiGurdy with a suitable USB-A to USB-B cable as shown in the picture above.
The USB-MIDI connection setup can be configured via the web interface of the MidiGurdy. Please see the section The Web Interface for more details.